
Best places to hike near me with minimal elevation gain? Forget Everest, we’re talking leisurely strolls with breathtaking views – the kind that leave you feeling invigorated, not defeated. This isn’t about conquering mountains; it’s about savoring nature’s beauty without the grueling uphill battle. We’ll explore how to find these hidden gems, decipher trail descriptions, and prepare for a safe and enjoyable adventure, ensuring your hike is more “ooh, pretty!” than “ouch, my knees!”
We’ll define “minimal” elevation gain for various fitness levels, arm you with resources to locate perfect trails (think apps, websites, and maybe even a friendly local squirrel), and dissect trail reviews like seasoned hiking detectives. We’ll even cover essential gear and safety tips, because even a flat hike can throw a curveball (like an unexpectedly enthusiastic badger). Get ready to ditch the strenuous climbs and embrace the joy of gentle exploration!
Defining “Minimal Elevation Gain”
So, you want to hike, but the thought of scaling Mount Everest in your Crocs fills you with a primal terror? Fear not, fellow flatlander! We’re here to define “minimal elevation gain” and help you find trails that won’t leave you gasping for air (unless you’re, you know, actually gasping for air due to other reasons, like a rogue squirrel attack).
This isn’t about conquering peaks; it’s about enjoying the scenery without needing a sherpa.Minimal elevation gain is subjective, like the perfect shade of beige or the ideal amount of cheese on a pizza. It hinges heavily on your fitness level and personal preferences. What’s a gentle stroll for a seasoned hiker could be a grueling ascent for a newbie.
Check easy walking trails near me with breathtaking views to inspect complete evaluations and testimonials from users.
Furthermore, a short, steep climb might feel more challenging than a longer, gradual incline. The type of terrain also plays a significant role; scrambling over loose rocks is far more strenuous than walking on a well-maintained path, even if the elevation gain is the same.
Elevation Gain Ranges by Fitness Level
The following table offers a suggested range for minimal elevation gain, keeping in mind that these are broad guidelines and personal experience will always be the ultimate arbiter. Remember, it’s always wise to check the trail descriptions and reviews before embarking on your hike to get a better sense of the terrain and difficulty.
| Fitness Level | Elevation Gain Range (feet) | Elevation Gain Range (meters) | Notes |
|---|---|---|---|
| Beginner | 0-500 | 0-150 | Focus on shorter trails with mostly flat terrain. A gradual incline is preferable to short, steep climbs. |
| Intermediate | 500-1500 | 150-450 | Comfortable with moderate inclines and longer distances. May enjoy trails with some elevation changes. |
| Advanced | 1500+ | 450+ | Experienced hikers comfortable with significant elevation changes and challenging terrain. |
Factors Influencing Perception of Minimal Elevation Gain
Several factors beyond pure numbers influence how challenging a hike feels. Trail length, for example, significantly impacts the overall exertion. A 500-foot elevation gain spread over five miles feels vastly different from the same gain crammed into one mile. Terrain type is another crucial element. A smooth, well-maintained path is far easier than a rocky, uneven trail, even with the same elevation gain.Finally, personal experience plays a huge role.
A hiker accustomed to mountain trails might consider a 1000-foot climb “minimal,” while a less experienced hiker might find it daunting. Listen to your body; if a trail feels too challenging, don’t hesitate to turn back or choose a different route. Remember, the goal is enjoyment, not suffering!
Locating Nearby Hiking Trails
So, you’re ready to conquer some trails, but you’re not keen on feeling like you’ve climbed Mount Everest by the time you reach the summit. Fear not, fellow flatlander! Finding low-elevation hikes is easier than you think, especially with the right tools and a dash of digital savvy. This section will equip you with the resources and strategies to locate those blissful, barely-there-inclined trails perfect for a gentle stroll or a leisurely hike.Finding trails that match your “minimal elevation gain” definition requires a multi-pronged approach.
We’ll cover the best online resources, essential evaluation criteria, and a step-by-step guide to using mapping tools to pinpoint your perfect, pancake-flat path.
Reliable Resources for Finding Hiking Trails
Many excellent resources can help you discover nearby trails. These range from comprehensive websites to handy smartphone apps, each offering unique features and benefits. Choosing the right tool depends on your preferences and the level of detail you need.
- AllTrails: This popular website and app boasts a massive database of user-submitted trails, complete with photos, reviews, elevation profiles, and difficulty ratings. Its filtering options allow you to specify your desired elevation gain, making it ideal for our low-impact hiking goals. Imagine a world map, speckled with colorful lines representing trails – that’s essentially what AllTrails offers, with detailed information on each.
- Hiking Project: Similar to AllTrails, Hiking Project provides a comprehensive collection of trails with detailed information, including elevation profiles and user reviews. Its interface is clean and user-friendly, making it easy to navigate and find trails that fit your criteria. Think of it as AllTrails’ more minimalist cousin, equally effective but with a different aesthetic.
- Local Parks and Recreation Departments: Often overlooked, your local parks and recreation department websites are treasure troves of information on nearby trails. They usually include maps, trail descriptions, and details on accessibility, making them a valuable resource for finding easily accessible, low-elevation options. These websites often feature stunning photographs of the local scenery, tempting you to explore!
- Local Hiking Clubs and Groups: Joining a local hiking club can provide access to insider knowledge and recommendations. These groups often organize hikes and share information about lesser-known trails, potentially uncovering hidden gems with minimal elevation changes. Visualize a friendly group of hikers sharing stories and maps around a campfire – that’s the spirit of these clubs.
Criteria for Evaluating Trail Suitability Based on Elevation Gain
Before embarking on any hike, carefully evaluate the trail’s suitability based on its elevation profile. Ignoring this crucial step can lead to unexpected exertion and disappointment. Consider these factors:
- Total Elevation Gain: This is the most crucial factor. Ensure the total elevation gain aligns with your definition of “minimal.” For example, a trail with less than 500 feet of total elevation gain might be considered minimal for some, while others might prefer even less.
- Elevation Profile: Examine the elevation profile graph provided by online resources. This visual representation shows the trail’s elevation changes throughout its length. Look for a relatively flat line indicating minimal ups and downs. A jagged line, on the other hand, signals a more challenging hike.
- Trail Length and Difficulty Rating: Even with minimal elevation gain, a very long trail can be tiring. Consider the trail’s length and difficulty rating in conjunction with the elevation profile. A short, easy trail with minimal elevation gain is ideal for a relaxed hike.
- User Reviews: Pay attention to user reviews on websites like AllTrails and Hiking Project. Other hikers’ experiences can offer valuable insights into the trail’s actual difficulty and elevation changes, often revealing subtle details not captured in the official descriptions.
Using Online Mapping Tools to Identify Trails with Minimal Elevation Gain
Mastering online mapping tools is key to finding your perfect low-elevation hike. Here’s a step-by-step guide:
- Select Your Mapping Tool: Choose a tool like Google Maps, AllTrails, or Hiking Project. Each has its own strengths, but most offer elevation profile data.
- Specify Your Location: Enter your current location or the area you want to explore.
- Utilize Filtering Options: Most mapping tools allow you to filter trails by criteria such as distance, elevation gain, and difficulty. Use these filters to narrow your search to trails with minimal elevation gain.
- Examine Elevation Profiles: Carefully review the elevation profile for each trail that appears in your search results. This visual representation will show you exactly how much elevation change to expect.
- Read User Reviews: Check user reviews to get a sense of the trail’s actual difficulty and to confirm the accuracy of the elevation profile.
Trail Descriptions and Reviews
Embarking on a hike without proper reconnaissance is like setting sail without a map – you might end up somewhere unexpectedly strenuous (and possibly swampy). Reading trail reviews is crucial, not just for avoiding surprises, but for maximizing your enjoyment of the great outdoors. Think of it as crowd-sourced intel, providing invaluable insights that can save your knees, your sanity, and possibly your phone battery.Trail reviews offer a vital reality check, especially concerning elevation gain.
Official park websites often present idealized versions of trails, sometimes glossing over the less-than-glamorous aspects of the climb. User reviews, on the other hand, provide a more granular, often brutally honest, perspective.
Assessing Elevation Gain Accuracy in Trail Reviews
Several factors influence the accuracy of reported elevation gain in trail reviews. Experienced hikers tend to be more precise in their descriptions, while casual hikers might underestimate or overestimate the difficulty. Furthermore, the use of different tracking devices can lead to discrepancies. Some apps might overestimate elevation change due to GPS inaccuracies, particularly in areas with dense tree cover or steep inclines.
Look for reviews that mention the method used to measure elevation gain (e.g., GPS watch, phone app) and cross-reference this information with other reviews. Inconsistencies in reported elevation should raise a flag. For example, if one review mentions a negligible elevation gain while others describe a challenging climb, further investigation is warranted. Consider the overall tone and detail level of the review; a detailed account with specific landmarks and time stamps is generally more reliable.
Comparing Reliability of Information Sources
Official park websites are a good starting point, offering an overview of the trail’s length and general difficulty. However, these descriptions can be somewhat generic and may not reflect the current trail conditions. User reviews, sourced from platforms like AllTrails or TripAdvisor, offer a more dynamic picture. These reviews are often accompanied by photos and ratings, which can help you visualize the terrain and assess the accuracy of elevation gain claims.
However, user reviews are subjective and can be influenced by individual fitness levels and experiences. A review mentioning a “grueling climb” from a seasoned marathon runner might be a moderate challenge for an average hiker. Therefore, it’s best to compare and contrast multiple reviews from various sources to get a well-rounded picture. Consider the number of reviews and the overall consensus; a consistent pattern across multiple reviews is more trustworthy than isolated opinions.
Check best hiking spots near me with stunning panoramic views to inspect complete evaluations and testimonials from users.
Trail Safety and Preparation: Best Places To Hike Near Me With Minimal Elevation Gain
Embarking on a low-elevation hike doesn’t mean you can waltz into the wilderness unprepared. Even seemingly gentle trails can present unexpected challenges, so a little forethought goes a long way in ensuring a safe and enjoyable adventure. Remember, even a flat walk can turn into a survival story if you’re not ready.Preparing for a hike, even a low-impact one, is crucial.
While the elevation gain might be minimal, other factors like weather, wildlife encounters, and unexpected injuries still need to be considered. This section will provide a comprehensive checklist and safety guidelines to help you navigate your hike with confidence, minimizing risks and maximizing enjoyment.
Essential Hiking Gear Checklist
A well-packed backpack is your best friend on any hike. The following items are essential, regardless of the elevation. Think of it as your personal survival kit for a day out in nature.
- Navigation: Map, compass (knowing how to use them is key!), and a GPS device or smartphone with a downloaded map application (ensure your phone is fully charged!). Getting lost, even on a flat trail, is surprisingly easy.
- Sun protection: Sunscreen (high SPF!), sunglasses, and a hat. Even on cloudy days, the sun’s rays can be surprisingly strong.
- Insulation: Layers of clothing appropriate for the expected weather conditions. Weather can change rapidly, so pack for both warm and cool temperatures.
- Illumination: Headlamp or flashlight with extra batteries. You might finish your hike later than expected.
- First-aid supplies: A comprehensive kit including bandages, antiseptic wipes, pain relievers, blister treatment, and any personal medications. Be prepared for minor scrapes and injuries.
- Fire starter: Waterproof matches or a lighter. While hopefully unnecessary, it’s better to be prepared.
- Repair kit and tools: Knife or multi-tool for minor repairs to gear.
- Nutrition: Plenty of water (more than you think you’ll need!), high-energy snacks (trail mix, energy bars), and a substantial lunch.
- Emergency shelter: A lightweight emergency blanket or bivy sack. Unexpected weather changes can make this a lifesaver.
Safety Considerations for Low-Elevation Hikes
While the lack of significant elevation change reduces some risks, other hazards remain. For example, flat terrain can mean longer distances, increasing the chances of dehydration or fatigue. Unexpected weather shifts, such as sudden downpours or extreme heat, can still impact your hike significantly. Remember that even seemingly harmless trails can be treacherous if you’re not prepared.
Be aware of your surroundings, and never underestimate the power of nature.
Emergency Preparedness Table
This table Artikels actions to take in various emergency scenarios during a low-elevation hike. Remember, quick thinking and preparation are your best allies.
| Scenario | Emergency Contact | Action Plan | Essential Gear |
|---|---|---|---|
| Injury (Sprain, Cut) | Pre-arranged emergency contact, 911 (if cell service available) | Assess the injury, administer first aid, seek help if necessary. Stay calm and signal for help if needed. | First-aid kit, whistle, cell phone, emergency blanket |
| Getting Lost | Pre-arranged emergency contact, park rangers (if applicable) | Stay put, conserve energy, signal for help (whistle, mirror). Try to retrace your steps if possible. | Map, compass, GPS, whistle, cell phone, extra water and food |
| Severe Weather (Sudden Storm) | Pre-arranged emergency contact, 911 (if cell service available) | Find shelter immediately, stay dry, and wait for the storm to pass. Avoid exposed areas. | Emergency blanket, rain gear, extra layers of clothing, cell phone |
| Wildlife Encounter (Non-aggressive) | None (unless injured) | Maintain a safe distance, observe the animal, and avoid any sudden movements. Slowly back away. | Bear spray (if applicable), binoculars (for safe observation) |
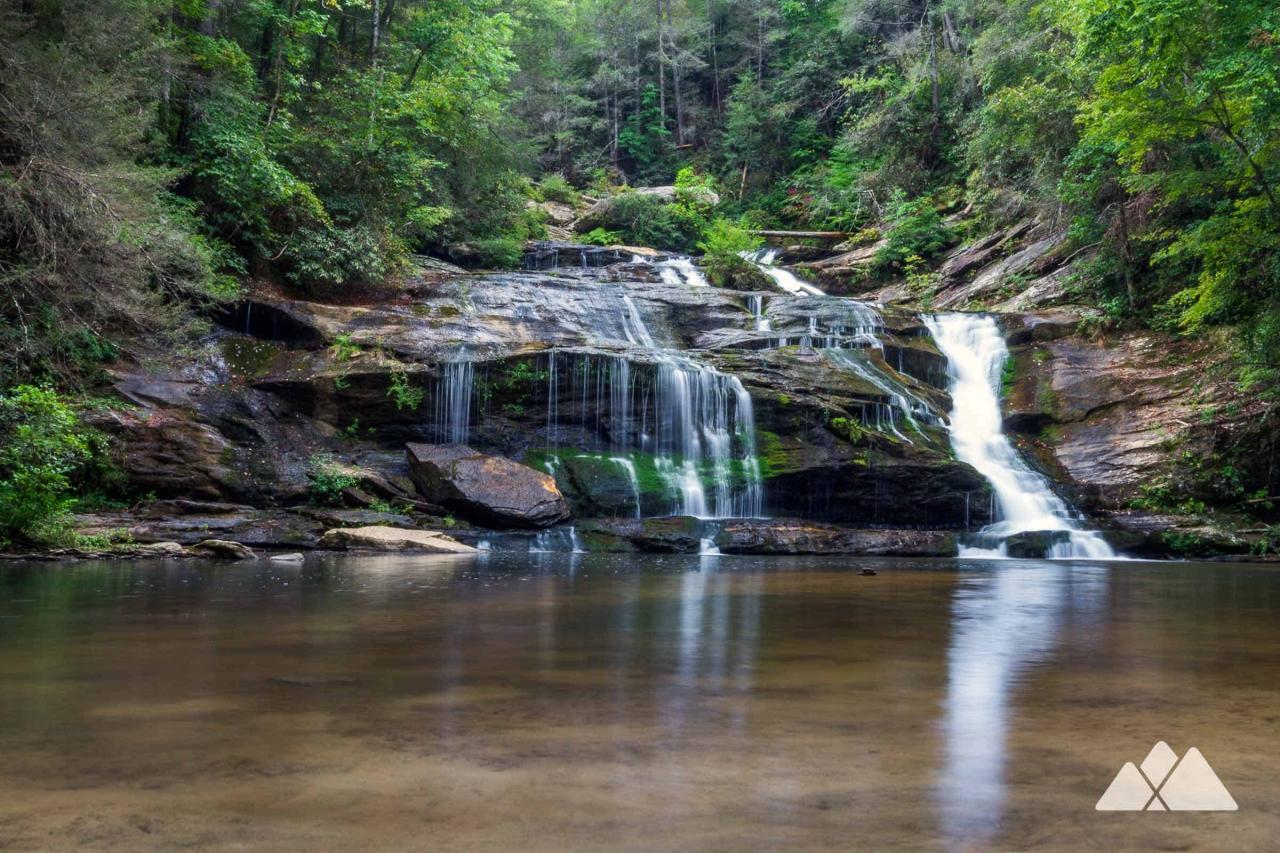
Illustrating Suitable Trails
Finding a hike that’s both scenic and gentle on the knees doesn’t require scaling Everest. Many fantastic trails offer stunning views with minimal elevation changes, perfect for a leisurely stroll or a family outing. Here are three examples that showcase the beauty of low-impact hiking.
Examples of Low-Elevation Trails, Best places to hike near me with minimal elevation gain
These trails are chosen for their relatively flat terrain and manageable distances, ensuring a pleasant hiking experience for everyone, regardless of fitness level. Remember to always check trail conditions and weather forecasts before embarking on your adventure.
- The Riverwalk Ramble: This 2.5-mile loop trail follows a gently meandering river, offering picturesque views of the water and surrounding riparian habitat. The terrain is primarily flat, consisting of well-maintained gravel paths and occasional stretches of packed dirt. Expect to see diverse birdlife, possibly even a playful otter or two if you’re lucky! The scenery is consistently lovely, with willows dipping their branches into the water and wildflowers blooming along the banks in season.
The minimal elevation gain makes this a perfect choice for families with young children or those seeking a relaxed hike.
- The Lakeside Loop: Clocking in at 3 miles, the Lakeside Loop offers breathtaking panoramic views of a serene lake. The trail itself is mostly flat, with only a few very slight inclines near the lake’s edge. The surface is mostly smooth, compacted earth, making it easy to navigate with strollers or wheelchairs (though always check accessibility features beforehand). Imagine yourself surrounded by the calming sounds of nature: the gentle lapping of waves, the chirping of crickets, and perhaps even the distant call of a loon.
The flat terrain ensures a stress-free experience, allowing you to fully appreciate the beauty of the lake and its surroundings.
- The Forest Path Frolic: This 4-mile trail winds through a lush, ancient forest, offering a shaded and peaceful escape from the everyday hustle. The path is primarily flat, with a few very minor undulations in the terrain. The trail surface is mostly soft, packed earth, providing a comfortable walking experience. The forest is teeming with wildlife; keep an eye out for squirrels, deer, and various species of birds.
The dappled sunlight filtering through the leaves creates a magical atmosphere, making this trail a perfect escape for nature lovers. The consistently flat nature of the path ensures that you can focus on enjoying the sights and sounds of the forest without worrying about strenuous climbs.
Comparing Trail Experiences

So, you’ve conquered the flatlands, navigated the gentle slopes, and maybe even accidentally face-planted into a particularly stubborn patch of wildflowers on your minimal elevation gain hike. But what about those trails that promise breathtaking views, but also a leg workout that’ll have you questioning your life choices? Let’s compare the two experiences, shall we?The experience of hiking trails with minimal elevation gain is, frankly, a different beast entirely compared to their more challenging counterparts.
One is a leisurely stroll, the other a thrilling (and sometimes grueling) adventure. Think of it like this: minimal elevation gain is your comfy slippers, while significant elevation gain is your brand new, slightly-too-tight hiking boots. Both have their place, but the experience is vastly different.
Benefits and Drawbacks of Minimal Elevation Gain Trails
Minimal elevation gain trails offer a plethora of advantages. They’re perfect for beginners, families with young children, or anyone looking for a relaxed day out in nature. The lack of strenuous uphill climbs means you can focus on enjoying the scenery, spotting wildlife, and perhaps even striking up a conversation with a fellow hiker without gasping for air.
Drawbacks? Well, you might miss out on the exhilarating feeling of summiting a peak and the stunning panoramic views that often accompany it. The sense of accomplishment might be slightly less intense, but hey, sometimes a gentle amble through nature is exactly what the doctor ordered.
Comparison of Trail Experiences
Let’s illustrate this with a comparison of two fictional trails: “Buttercup Meadow Stroll” (minimal elevation gain) and “Mount Doom’s Revenge” (significant elevation gain).
| Feature | Buttercup Meadow Stroll (Minimal Elevation Gain) | Mount Doom’s Revenge (Significant Elevation Gain) |
|---|---|---|
| Difficulty | Easy; suitable for all fitness levels. Think a pleasant afternoon walk. | Strenuous; requires a good level of fitness and endurance. Prepare for a serious workout. |
| Elevation Gain | Less than 100 feet total. Basically, you’re walking on a pancake. | Over 2000 feet. Prepare for your quads to scream in protest. |
| Scenery | Beautiful wildflowers, gentle streams, and possibly some adorable squirrels. A peaceful, picturesque landscape. | Breathtaking panoramic views from the summit, but the path might be less scenic in parts. The reward is worth the climb, though! |
| Time Commitment | 1-2 hours, allowing for leisurely stops and photo opportunities. | 4-6 hours, possibly longer depending on your fitness level and breaks. This is not a quick jaunt. |
Concluding Remarks

So, there you have it – your passport to effortless exploration! Whether you’re a seasoned hiker looking for a relaxing change of pace or a newbie taking your first steps into the wilderness, finding trails with minimal elevation gain opens up a world of scenic possibilities. Remember to always prioritize safety, check the weather, and maybe pack an extra granola bar (for emergencies…or squirrels).
Happy hiking!