Shortest and easiest hiking trails near my current location? Why, you magnificent mountain goat, you’ve stumbled upon the very guide you need! Forget Everest, we’re talking ambling adventures, gentle inclines that wouldn’t challenge a sloth, and trails so short, you could probably hike them twice before your coffee gets cold. Prepare to ditch the strenuous climbs and embrace the leisurely exploration of nature’s gentler side.
This isn’t about conquering peaks; it’s about embracing the simple joy of a stroll with a view.
This guide will equip you with the tools and knowledge to discover those hidden gems—the perfectly manageable trails that fit your schedule and fitness level. We’ll cover everything from finding the best resources to packing your bag, ensuring your next hiking trip is less “grueling expedition” and more “pleasant afternoon ramble.” Get ready to discover your new favorite nearby trails!
Defining “Shortest and Easiest”: Shortest And Easiest Hiking Trails Near My Current Location

So, you’re looking for a hike that’s less “Mount Everest” and more “gentle stroll in the park,” right? Let’s unpack what “shortest and easiest” actually means in the world of trailblazing. It’s not as simple as it sounds!Defining “shortest” is pretty straightforward – it’s the linear distance from trailhead to trail’s end. However, “easiest” is a bit more subjective, a delightful blend of science and personal preference.
Finish your research with information from local parks with walking trails and restrooms nearby.
We’re talking terrain (smooth, rocky, muddy?), elevation gain (that uphill battle!), and overall trail condition (well-maintained or overgrown?).
Trail Length and Terrain Difficulty
Short trails are generally considered anything under 2 miles. However, a 1-mile trail through a dense forest with lots of roots and rocks will feel significantly harder than a 1.5-mile paved path alongside a river. Think of it like this: a half-mile hike up a steep incline will feel longer and more strenuous than a mile-long walk on flat, well-maintained ground.
A short, but very steep trail could be technically challenging, while a longer, gently sloping trail might be considered easier. Examples of “short” trails could include a nature walk around a local park (perhaps 0.75 miles), a loop trail in a botanical garden (maybe 1.2 miles), or a paved path along a canal (potentially 1.8 miles). The “easiest” of these would be the paved path, assuming it’s flat.
Obtain access to discovering the most beautiful hiking spots near me to private resources that are additional.
Elevation Gain and Fitness Levels
Elevation gain is a crucial factor. A trail with minimal elevation change (essentially flat) is considerably easier than one with significant uphill climbs. Even a short trail with a steep incline can be a real workout! The key here is individual fitness. What’s “easy” for a seasoned hiker might be a Herculean effort for someone just starting out.
A 1-mile trail with a 200-foot elevation gain could be manageable for a fit individual, but incredibly challenging for someone with limited hiking experience. Consider a trail described as “easy” with only a slight incline. This could easily be considered a “moderate” or even “strenuous” hike for someone with limited physical fitness or mobility issues. Conversely, a longer trail with a gradual incline might be a perfect “easy” hike for someone used to regular exercise.
Locating Nearby Trails
So, you’re ready to ditch the couch and embrace the great outdoors, but where to begin? Finding the perfect, delightfully short and easy hiking trail can feel like searching for a needle in a haystack (a very, very scenic haystack, of course). Fear not, intrepid adventurer! We’re about to navigate you through the digital wilderness of trail-finding resources.Finding the ideal hiking trail in your vicinity requires utilizing various resources, each offering unique advantages and drawbacks.
A multi-pronged approach often yields the best results, combining the strengths of different tools to paint a complete picture of nearby trails.
Trail-Finding Resources: A Comparison
Several online and offline tools can help you pinpoint those perfectly petite paths. Let’s examine some popular options:
- Online Mapping Services (Google Maps, Bing Maps): These ubiquitous services are surprisingly useful for trail discovery. Their strengths lie in their familiarity and ease of use. You can easily zoom in on your area, and often, hiking trails are clearly marked. However, their trail information can be incomplete or inaccurate, particularly for less-maintained or lesser-known paths. Detailed trail descriptions and difficulty ratings are often absent.
- Dedicated Hiking Apps (AllTrails, Hiking Project): These apps are specifically designed for hikers, offering detailed trail maps, reviews, photos, elevation profiles, and difficulty ratings. Their strengths are their comprehensive data and community features, allowing you to see user-submitted photos and read reviews from fellow hikers. However, they may require a subscription for full access to all features, and the information relies on user contributions, which may not always be perfectly accurate or up-to-date.
- Local Tourism Websites: Check the tourism websites for your city, county, or region. They often feature lists of local hiking trails, with descriptions and directions. Their strength lies in the local expertise; they tend to focus on well-maintained, popular trails. However, they may not be as comprehensive as dedicated hiking apps, and the information might be less detailed.
Using Online Mapping Tools: A Step-by-Step Guide
Let’s use Google Maps as an example to illustrate the process. This approach can be adapted to other mapping services.
- Open Google Maps: Launch Google Maps on your computer or mobile device.
- Enter Your Location: Type your current address or location into the search bar.
- Zoom In: Zoom in on your immediate surroundings until you can see streets and parks clearly.
- Search for “Hiking Trails” or “Trails”: Use the search function within Google Maps to search for “hiking trails” or simply “trails” near your location.
- Examine Results: Google Maps will display nearby trails (if any are listed). Click on a trail to view more details, including its length, and sometimes, a preview of its path. Remember that Google Maps’ trail information might not be as comprehensive as dedicated hiking apps.
- Check for Reviews and Photos: If available, check user reviews and photos to get a better sense of the trail’s condition and scenery.
Trail Information Gathering
So, you’ve decided to ditch the couch and embrace the great outdoors – excellent choice! But before you lace up those hiking boots and embark on your adventure, a little reconnaissance is key. Failing to prepare is preparing to fail, as the saying goes, and that applies doubly so when navigating the wilderness, even on the shortest and easiest trails.
Proper research can turn a potentially frustrating experience into a delightful ramble.Knowing what to look for when researching a trail is like having a secret weapon in your hiker’s arsenal. It helps you avoid unexpected scrambles up near-vertical cliffs (unless, of course, that’s your thing!), soggy swamp treks, or realizing halfway through that the “easy” trail is actually a five-mile uphill slog.
Key Trail Information
Gathering the right information is crucial for a successful hike. Distance, elevation gain, trail surface type, and user reviews are all essential factors to consider. Understanding these elements allows you to choose a trail that matches your fitness level and expectations, preventing disappointment and ensuring a fun experience. Ignoring this step is a recipe for blisters, frustration, and maybe even a slightly bruised ego.
| Trail Name | Distance (miles) | Elevation Gain (feet) | Difficulty Rating | User Reviews |
|---|---|---|---|---|
| Easy Breezy Creek Trail | 1.2 | 50 | Easy | “Lovely, flat, and perfect for a stroll with the dog!”
|
| Gentle Slope Nature Walk | 2.0 | 150 | Easy/Moderate | “Slightly hilly in parts, but overall a nice, manageable hike.”
|
| Slightly Challenging Summit Trail (beginner section) | 1.5 | 200 | Moderate | “The first mile is easy, then it gets a bit steeper. Still doable for moderately fit individuals.”
|
| The Surprisingly Flat Path | 0.8 | 20 | Easy | “Exactly as advertised! Perfect for a quick, relaxing walk.”
|
Interpreting Trail Descriptions
Trail descriptions often use evocative language (“scenic overlook,” “gentle incline”). However, it’s crucial to translate this into concrete terms. A “gentle incline” for one person might be a heart-stopping climb for another. Look for specific details: Is the trail mostly flat, slightly rolling, or steeply inclined? Is the surface paved, gravel, dirt, or rocky?
Are there any known hazards mentioned (e.g., stream crossings, exposed areas)? Consider your own fitness level and experience when evaluating these descriptions. For instance, a trail described as having “some rocky sections” might be manageable for experienced hikers but challenging for beginners. Similarly, a trail described as having “several stream crossings” might require waterproof boots or caution during wet conditions.
Don’t hesitate to look at photos or videos of the trail online to get a better visual understanding of the terrain.
Assessing Trail Suitability
Choosing the perfect trail is like picking the perfect pair of shoes – you wouldn’t wear hiking boots to a gala, and you shouldn’t tackle a mountain trail in flip-flops (unless you’re aiming for a Darwin Award). Understanding the nuances of trail surfaces and elevation changes is key to a safe and enjoyable hike.Trail surfaces significantly impact the ease of your trek.
Paved trails are the smoothest sailing, perfect for strollers, wheelchairs, and those who prefer a less rugged experience. Gravel trails offer a bit more texture, providing good drainage but potentially causing some ankle-rolling if you’re not paying attention. Dirt trails, the most common type, range from nicely packed earth to loose, uneven paths that require more careful footing. Imagine the difference between walking on a freshly paved road versus navigating a rocky stream bed – that’s the spectrum of difficulty we’re talking about here.
Trail Surface Impact on Hiking Ease
Paved trails, as mentioned, are the easiest. They’re generally flat and offer minimal resistance. Gravel trails present a moderate challenge, requiring more attention to footing. Dirt trails can range from easy to challenging depending on their condition, with loose dirt or rocky sections increasing the difficulty. For instance, a well-maintained dirt trail in a park will be far easier than a rugged, root-filled trail in a forest.
Elevation Gain and Hiking Difficulty
Elevation gain, the vertical distance you climb, is a major factor in determining trail difficulty. A small elevation gain over a long distance might be manageable for most, while a steep incline over a short distance can be incredibly challenging. Consider a gradual, 100-meter climb spread over 2 kilometers versus a 100-meter climb in just 500 meters – the latter will leave you huffing and puffing significantly more.
Factors like your fitness level, age, and any pre-existing health conditions all play a role in how you’ll experience this elevation change. For example, a seasoned hiker might find a moderately steep trail manageable, whereas someone with knee problems might find the same trail too strenuous.
Factors Affecting Trail Suitability
Before you lace up your boots, consider these factors that could make a trail unsuitable:
- Weather conditions: Extreme heat, rain, snow, or ice can significantly increase the difficulty and danger of a hike. Imagine trying to navigate a slippery, muddy trail in the pouring rain – not exactly an idyllic afternoon stroll.
- Physical limitations: Individuals with mobility issues, heart conditions, or respiratory problems need to carefully assess a trail’s difficulty. A trail with significant elevation gain might be inappropriate for someone with knee problems.
- Trail length and time commitment: Longer trails require more stamina and time. If you’re short on time or energy, choose a shorter, easier trail.
- Trail maintenance: Poorly maintained trails can be hazardous, with obstacles like fallen trees or erosion making them difficult and dangerous to navigate. A trail report or recent reviews can be incredibly helpful here.
- Wildlife encounters: Depending on the location, you might encounter wildlife. Be aware of the potential dangers and take appropriate precautions (bear spray in bear country, for instance).
Preparing for the Hike
So, you’re ready to conquer those ridiculously short and easy trails? Fantastic! But before you unleash your inner mountain goat (even if that mountain is, let’s be honest, a slightly elevated patch of grass), a little preparation goes a long way. Think of it as pre-hike pampering for your adventurous spirit.Preparing properly ensures a safe and enjoyable experience, transforming a potential “Oh dear, I forgot my water!” moment into a triumphant “I conquered that hill AND stayed hydrated!” victory.
We’re aiming for smooth sailing, not a wilderness survival story.
Essential Hiking Gear for Short, Easy Trails
Packing for a short and easy hike doesn’t require a Sherpa’s strength or a mule’s carrying capacity. However, even the shortest jaunt benefits from a few key items. Overpacking is unnecessary, but under-preparing can lead to discomfort or worse.
- Water: Even on a short hike, dehydration can sneak up on you. Bring enough water to stay quenched. A reusable water bottle is environmentally friendly and saves you money in the long run.
- Snacks: Energy bars, trail mix, or even a piece of fruit can prevent a mid-hike energy crash. Think of it as fuel for your tiny adventure.
- Appropriate Footwear: Sneakers or hiking shoes are ideal. Flip-flops are a fashion no-no for anything beyond a stroll to the mailbox. Comfort is key here – blisters are the enemy of fun.
- Sunscreen and Hat: Even on cloudy days, the sun can still zap your skin. Protect yourself from harmful UV rays.
- Basic First-Aid Kit: A small kit with bandages, antiseptic wipes, and pain relievers can handle minor scrapes and aches. Think of it as your personal wilderness spa kit (for minor emergencies only, of course).
Hiking Safety Tips
Safety first! While these trails are easy, being aware of your surroundings and taking precautions can prevent minor mishaps from turning into major headaches.
- Let Someone Know Your Plans: Tell a friend or family member where you’re going, what trail you’re taking, and when you expect to be back. This simple step provides peace of mind.
- Stay on Marked Trails: Sticking to designated paths prevents getting lost and protects the environment.
- Be Aware of Wildlife: Observe animals from a safe distance and never approach or feed them. A respectful distance is key to a peaceful encounter.
- Pace Yourself: Don’t rush. Enjoy the scenery and take breaks when needed. Remember, it’s about the journey, not just the destination (even if the destination is just a slightly higher point on the trail).
Checking Weather Conditions Before You Go
Before you even think about lacing up your hiking boots, check the weather forecast. A sudden downpour can transform a pleasant stroll into a soggy, miserable experience. Websites, weather apps, and even a quick glance at the news can provide valuable information. Adjust your plans accordingly – if the weather looks dodgy, reschedule or choose an alternative activity.
Remember, a rained-out hike is still better than a soaked-to-the-bone hike.
Illustrating Trail Features
Choosing the right trail depends heavily on understanding what makes a trail easy or difficult. Knowing the visual cues of a well-maintained path versus a more challenging one can save you from unexpected scrambles and muddy mishaps! Think of it as trail-based detective work – learning to read the signs of the path before you even set foot on it.A well-maintained, easy hiking trail is a joy to behold.
It’s like a well-manicured garden path, but for your hiking boots.
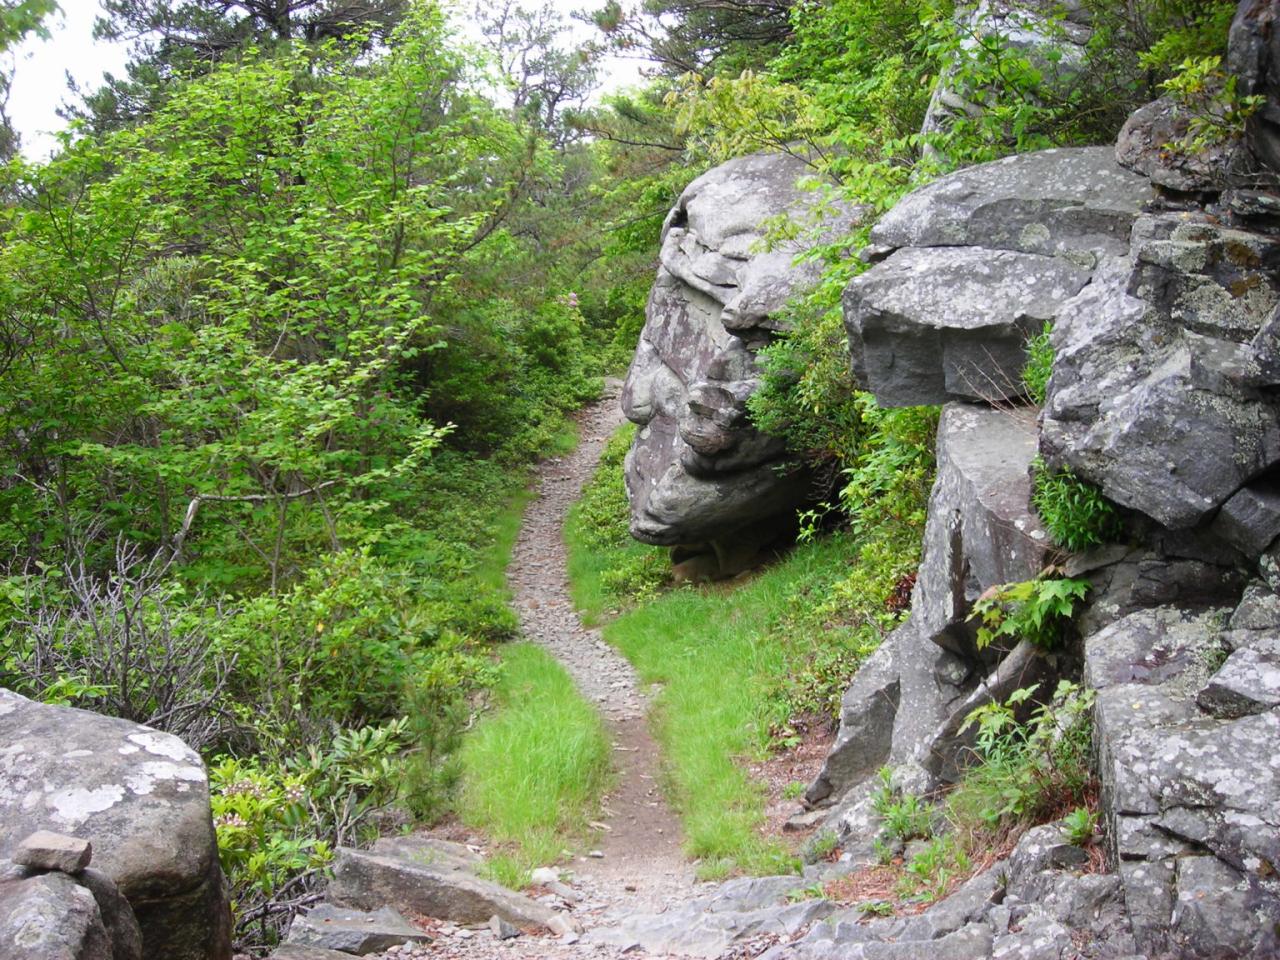
Easy Trail Characteristics
The surface is relatively smooth and even, mostly free of rocks, roots, and significant elevation changes. Imagine strolling along a gently sloping, packed-dirt path, perhaps with a scattering of small, easily navigated pebbles. Clear markings, like painted blazes on trees or strategically placed posts, are consistently visible, guiding you along the way with the reliability of a seasoned sherpa.
The vegetation is neatly trimmed, allowing for an unobstructed view of the path and the surrounding scenery. There’s a sense of ease and flow, a gentle rhythm to your steps, encouraging you to relax and enjoy the surroundings. Think of it like walking through a park – pleasant, predictable, and peaceful.
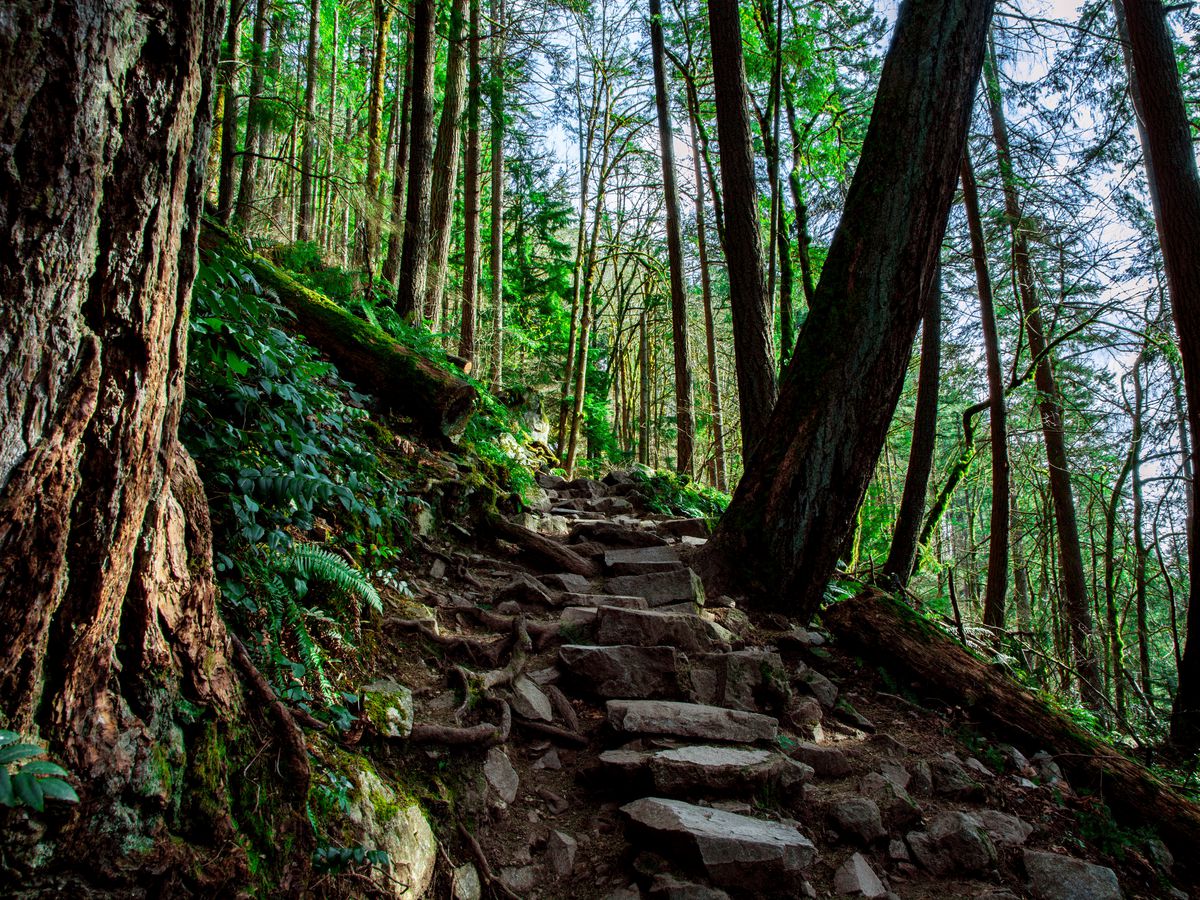
Challenging Trail Characteristics
Now, let’s contrast that with a more challenging trail. The ground becomes a rollercoaster of uneven terrain – think rocky ascents, steep declines, and roots that seem determined to trip you up. The path itself might be less defined, with overgrown vegetation encroaching on the trail, forcing you to weave your way through bushes and branches. Imagine scrambling over boulders the size of small cars (okay, maybe slightly smaller), navigating a slope so steep you feel like you’re climbing a ladder.
Markings might be sparse or faded, leaving you questioning if you’ve strayed from the path. The overall experience feels less like a stroll and more like an adventure, demanding more focus and physical exertion.
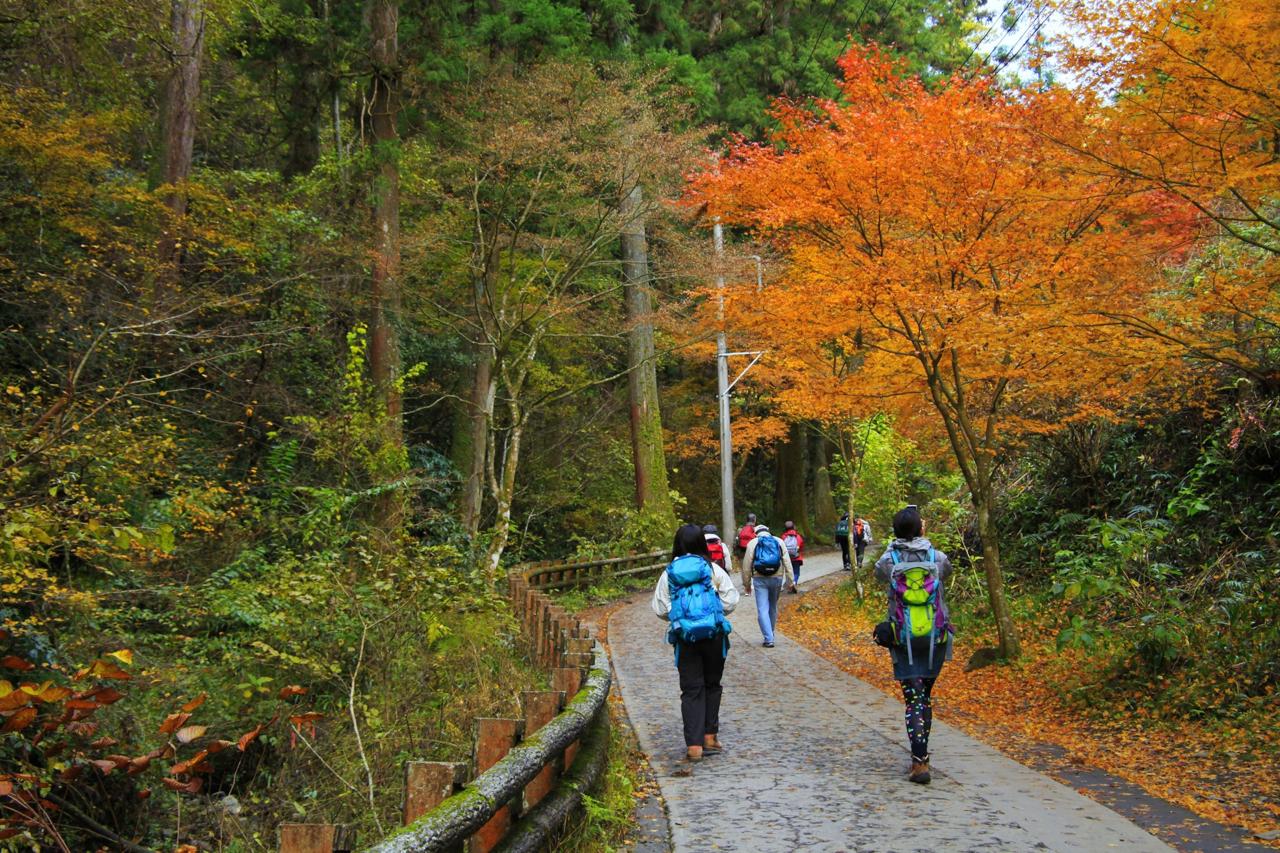
A Short, Easy, and Scenic Trail Description, Shortest and easiest hiking trails near my current location
Picture this: a sun-dappled path winds gently through a meadow ablaze with wildflowers. The air hums with the buzz of bees and the chirping of crickets. The trail, a soft carpet of packed earth, is clearly marked by cheerful red blazes on the sturdy oak trees lining the way. The only obstacles are the occasional, easily stepped-over tree root.
A gentle incline leads you to a breathtaking vista – a sparkling lake nestled amongst rolling green hills, the distant mountains providing a dramatic backdrop. The breeze carries the scent of pine and damp earth, a symphony of nature’s aromas. It’s the kind of trail that invites you to linger, to breathe deeply, and to simply be present in the moment.
The gentle rhythm of your footsteps and the beauty of the surroundings create a sense of calm and well-being. It’s a trail that whispers stories of peace and tranquility.
Last Point

So, there you have it – your passport to painless, picturesque hiking adventures! Remember, the best hike is the one you actually enjoy, so ditch the pressure, embrace the easy, and get ready to discover a whole new world of accessible outdoor exploration. Happy trails, and may your steps be light and your views be breathtakingly beautiful (even if the trail itself is only a few hundred yards long!).
Now go forth and conquer… those gently sloping hills!
1 thought on “Shortest and Easiest Hiking Trails Near Me”